Develop a credit risk scoring solution with ADS and Watson Studio
In this article I am covering how to develop a simple decision service with the new IBM Automation Decision Service product using Decision Model Notation, a Quarkus app to call the deployed service and a Watson ML predictive scoring model. This article is inspired from the work done by Pierre Berlandier on that subject.
At the highest level the solution looks like in the following system context diagram:
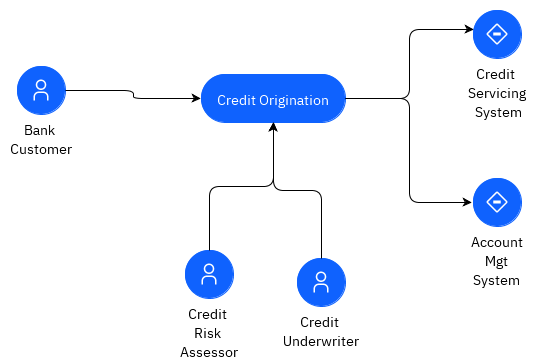
But we are more interested by the components involved in this demo:

To get started with ADS product, I recommend to follow the ADS product documentation Getting Started tutorial. In this article, I am detailing some sections of this tutorial and add other development practices like Quarkus integration, adopting event processing and predictive scoring.
The business use case is quite simple as it is based on a person asking for a credit to his/her bank. Each person is classified as good or bad and then rules defined combined risk score from other business rules and a predictive score.
The credit scoring predictive model is based on the Kaggle German credit data set.
Pre-requisites
You need to get the following products / tool available to your environment
- Maven
- Quarkus CLI
- Access to an OpenShift Cluster. For example using Red Hat OpenShift on IBM Cloud.
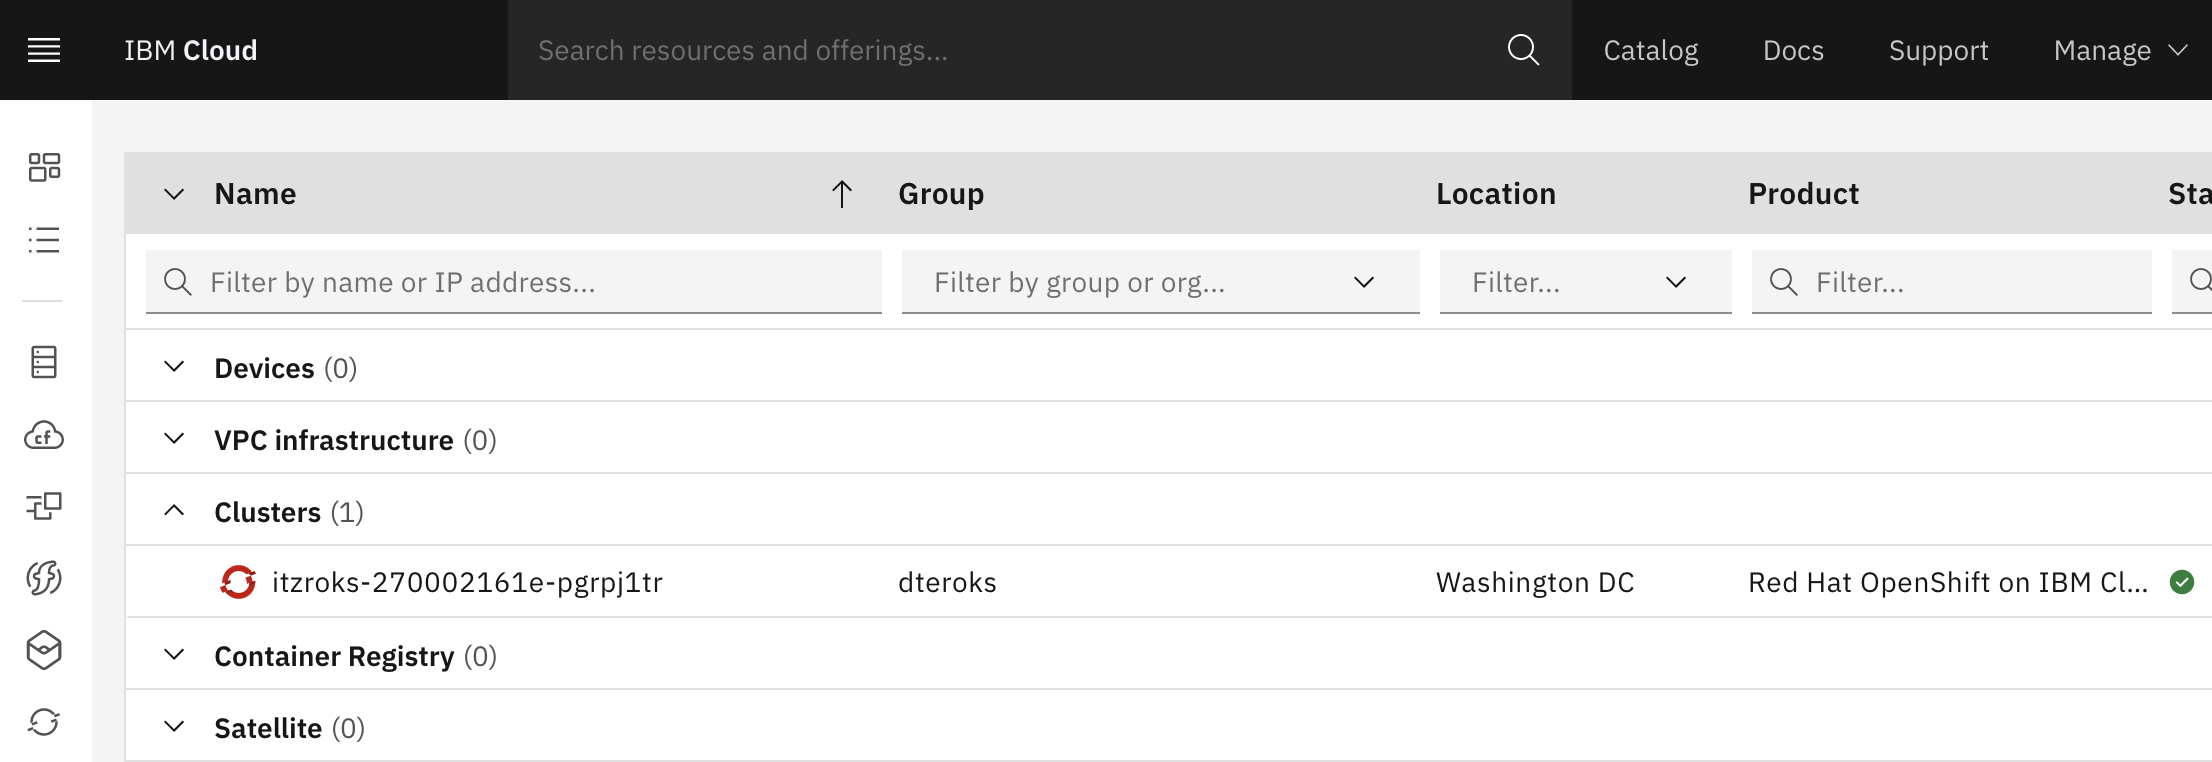
Open the OpenShift Console and get access to the login CLI
- Get Cloud Pak for Automation deployed with ADS configured.
- Get one Waston Studio instance on IBM Cloud
Too long to read
If you just want to see the code, go to this repository and browse the solution, or import it in your own Automation Studio: to do so perform the following steps:
- Clone this git repository
git clone https://github.com/ibm-cloud-architecture/ads-assess-credit-risk - Connect to Automation Decision Designer: If you need details on how to connect, see this section
- Add Decision Automation Service project, see this section) for details but come back here once done.
- Import the decision service
- Navigate into the decision model using the Designer.
Connect to Automation Studio
To get visibility of the different access points, and user credentials of the Cloud Pak for Automation components use the icp4adeploy-cp4ba-access-info config map:
# under the project where the common services are deployed
oc describe cm icp4adeploy-cp4ba-access-info
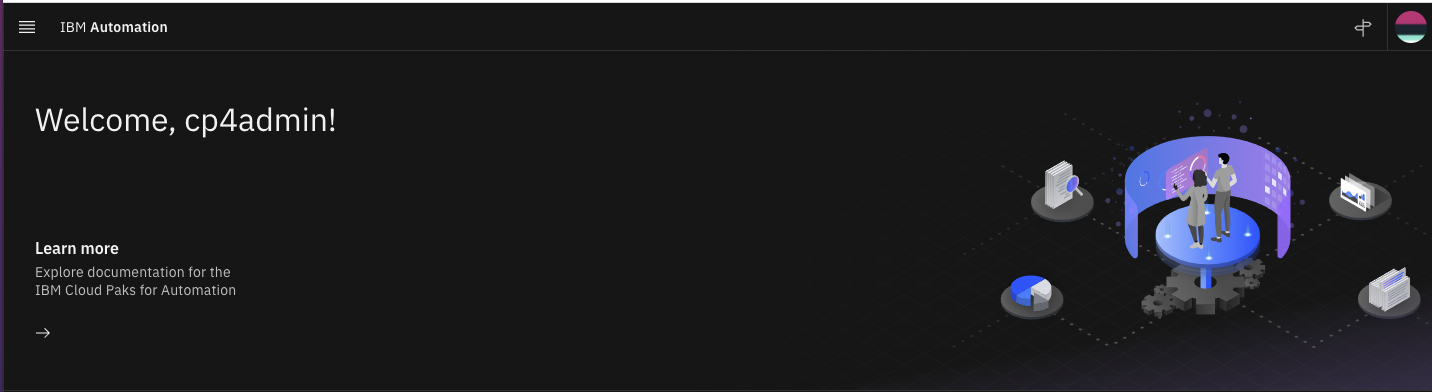
Look at the bastudio-access-info. The address may start with https://cpd-<projectname>-<clustername>
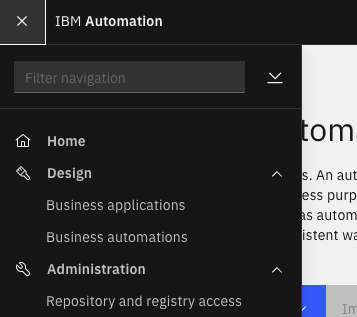
- Once logged in, the IBM Automation, go to the Navigation bar.
- Select Business Automation Studio app, on the left menu:
Play with existing solution
Warning
If you want to develop the solution continue on the next section. If not import and review the content of the decision service.
Import the demo
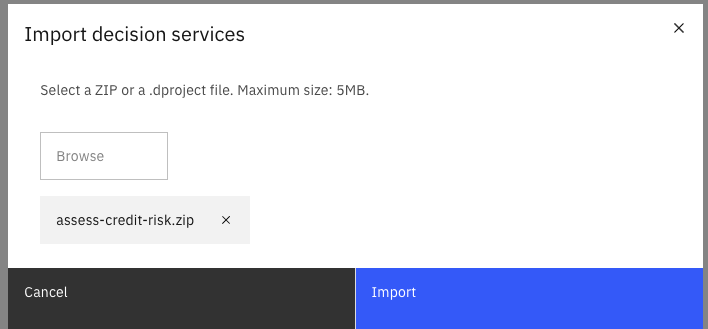
- Use
Importbutton from main Business Automation home page, select theassess-credit-risk.zipfile from theads-assess-credit-riskcloned repository.
- Select
ads-assess-credit-risktile from theDecision Servicesview, you should see the assess risk decision and a risk prediction.

Navigate into the content:
The model designer is giving us the current model implementation.
- Select the
Assess Riskdecision model, which lead to the decision model designer view:

The diagram shows us the combined risk assessment is defined from the loan data, a risk prediction and a relationship assessment.
- From there you can review the
Loanentity, and using theGo to Data modelbutton, you can look at the data model definition
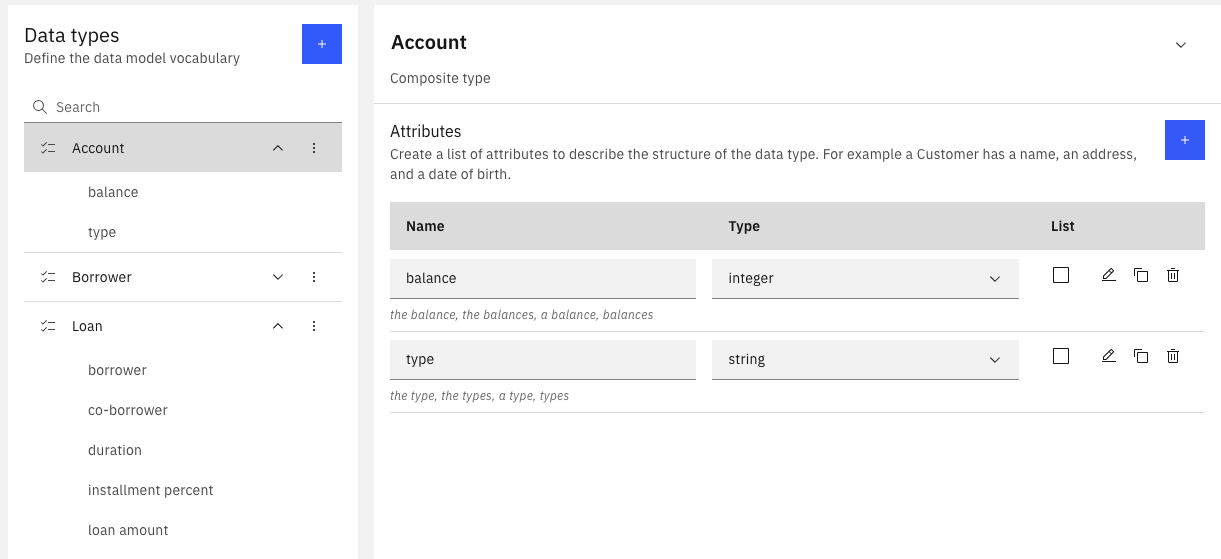
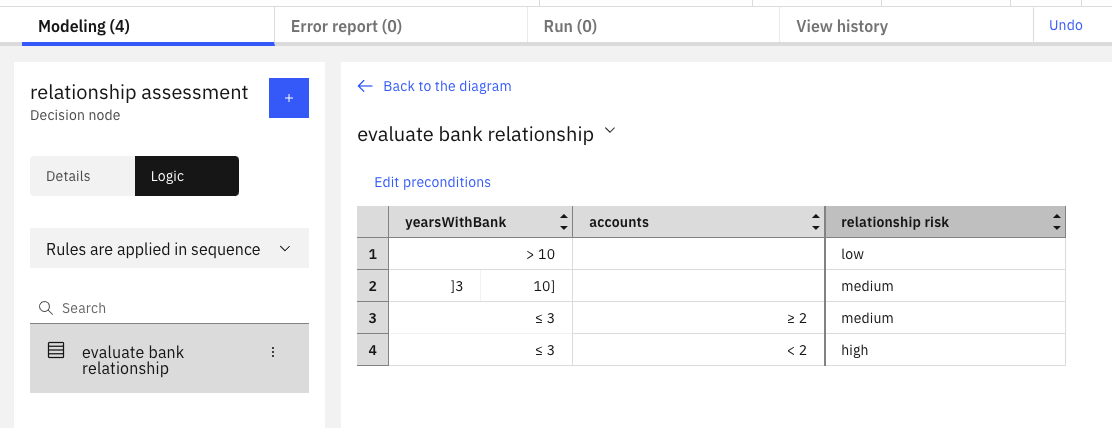
- Selecting the
relationship assessmentnode in the DMN, and then theLogicbutton, we can see a decision table which is setting a risk value according to the number of owned accounts, and the number of years as bank customer.
You can continue to navigate into this simple decision model
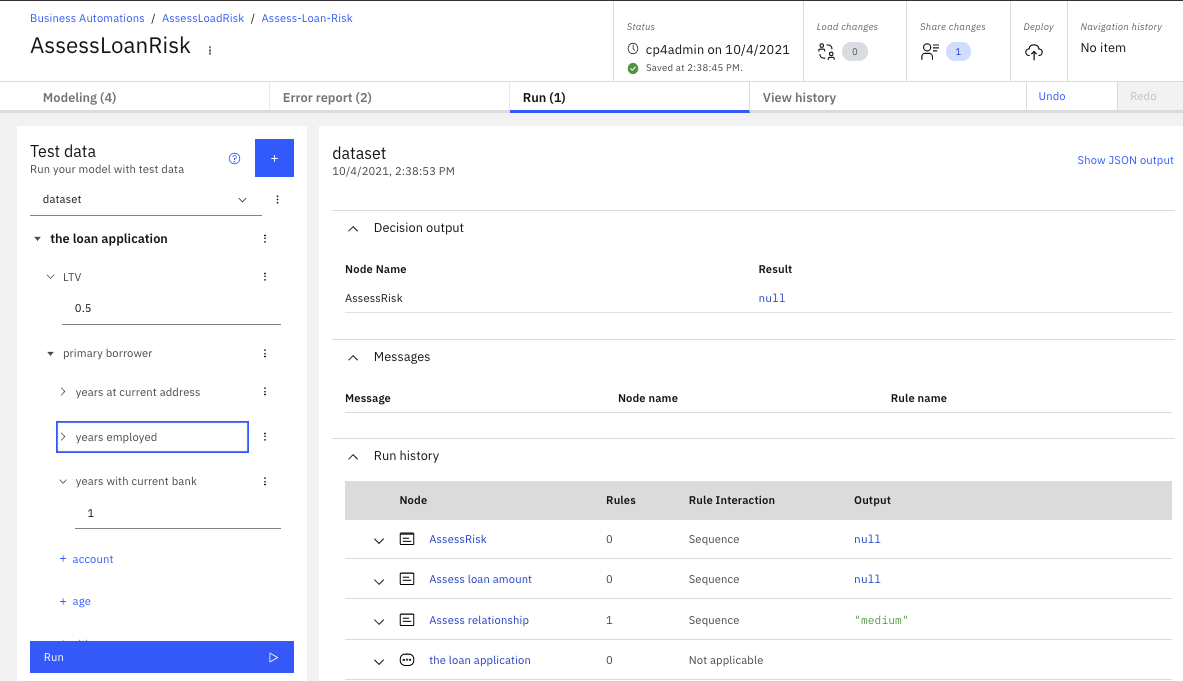
Test it
Selecting Run will help us to test the model. Running with no data will return a null output.
{
  "loan": {
    "borrower": {
      "accountses": [
        {
          "type": "Primary",
          "balance": 2000
        }
      ],
      "years with bank": 5,
      "years employed": "",
      "years at current address": 6,
      "age": 30
    }
  }
}
Deploy it
Work on the Automation Decision Service
Create a new decision automation
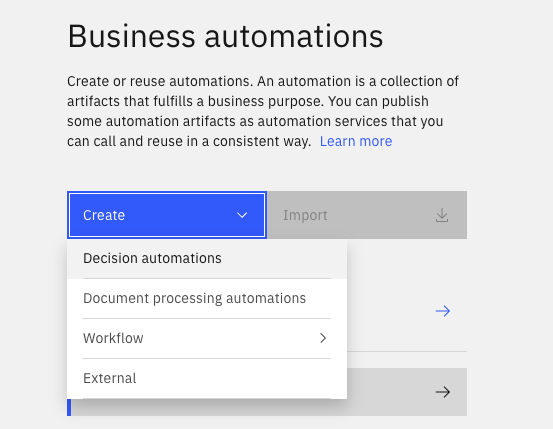
- Select the
Createbutton and theDecision Automationchoice,
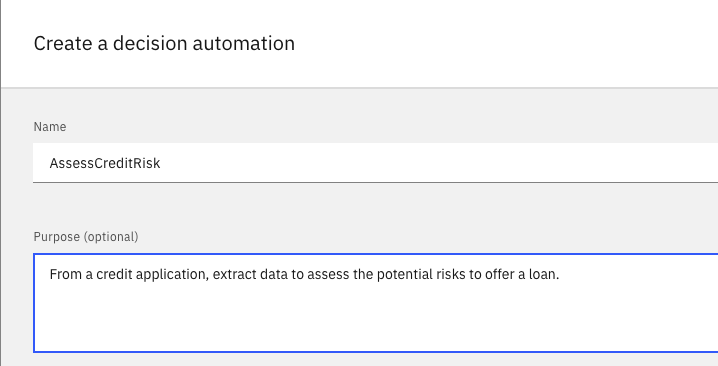
Define a name according to the business intent:
- From the home page for the decision automation, we need to add decision service, define decisions, model...
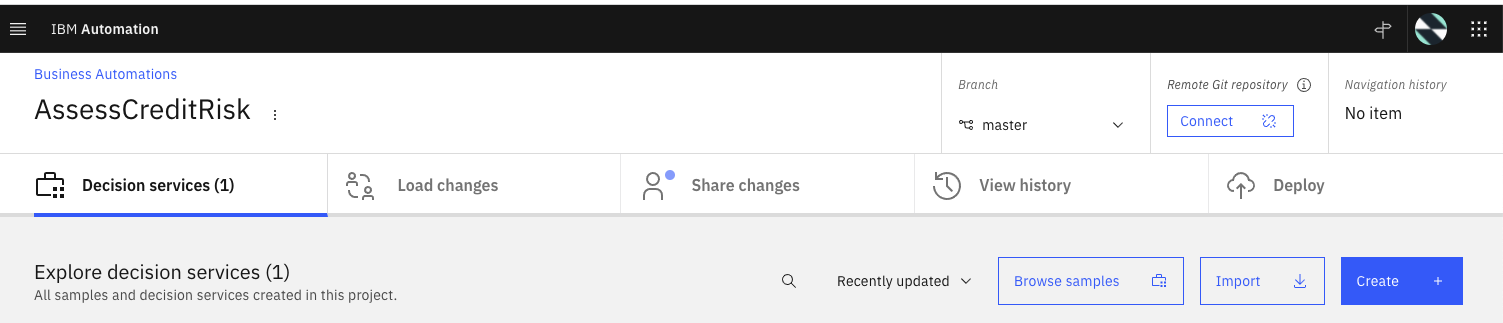
Create Decision Services
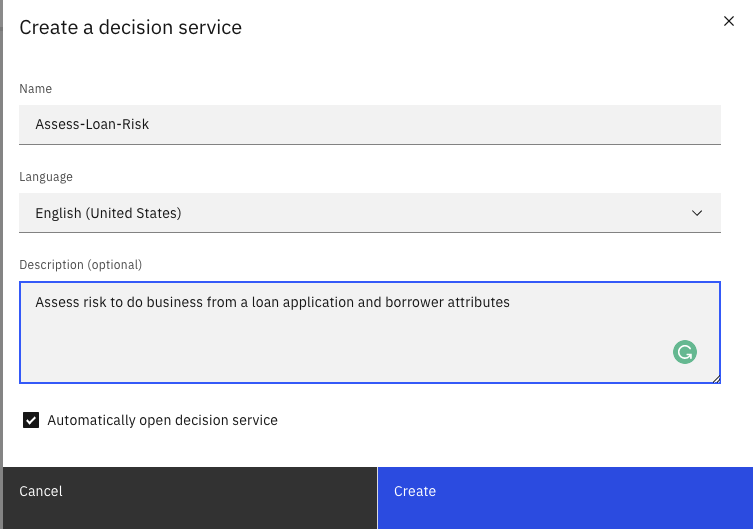
Create a decision service to start creating all the artifacts you need to capture your decision.
In the Decision Service page, start by adding model:

Define Decision Model
This is where the analysis work done before by the business analysts will help define the elements of the decision model.
- First we create the DMN model:

Which leads us to the DMN designer:

With decision model, we do not want to define complex data model, but focus only on the relevant attributes needed to take business decisions.
Once we renamed the decision (to AssessRisk) and select the Output type to change the type to be a Risk instead of a String.

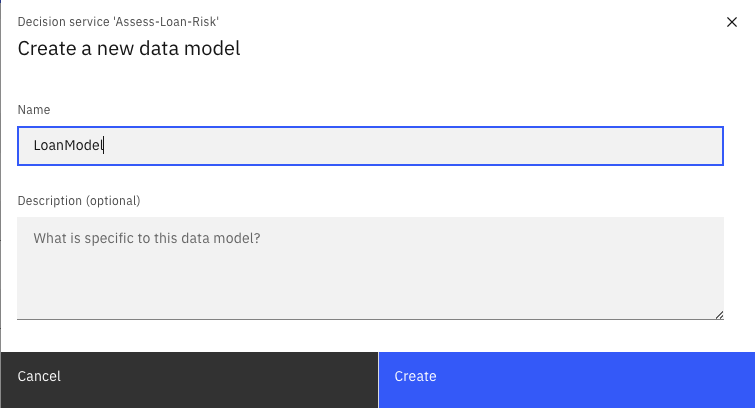
When we first open the data modeler, we need to specify a model name LoanModel.
Define the decision output
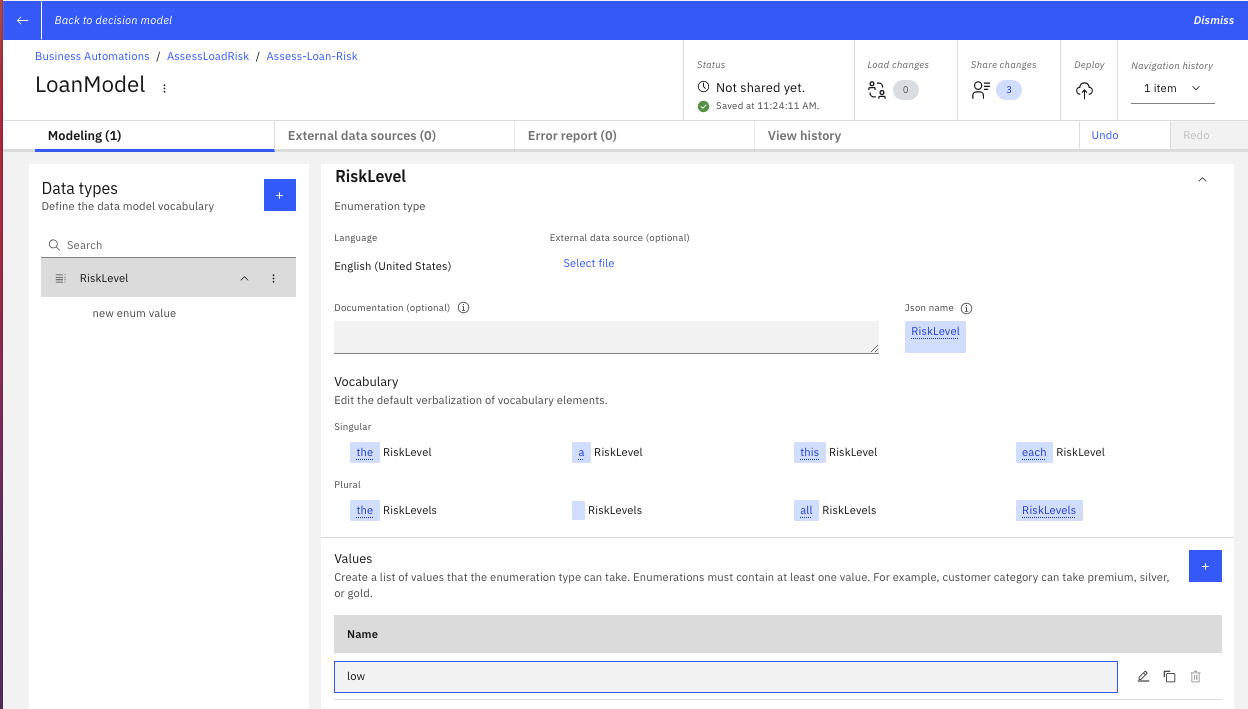
- The we can define enumeration type (Like a
RiskLevelwithlow, medium, highvalues):
- And define the
Riskcomposite type:
The Business Analysts and load underwriter defined the following requirements:
- The Risk aggregates a set of sub risk assessments and scoring: predictive, relationship to derive a combined value.

- Once the Risk and Risk Level are defined we can change the output of the decision to be a Risk, using the
Output Typecombo-list.
Some business decision analysis
What kind of input do we need to use to compute a risk?. In this example we will make it simply by looking at the following requirements:
- A loan application has borrower and co-borrowers.
- A borrower has Accounts, each with a balance and a type. This will help to compute current assets.
- A borrower has classical human characteristics but also the information about the number of years with employers, type of employment, and the number of years with the same bank.
- Finally the loan application, the expected duration, type, amount to borrow, and property value.
- The loan to value ratio can be computed if not set by the decision service client.
Extend the input model
So we need Borrower, LoanApplication, Account as Composite types. We do not need to detail all attributes for each entities. Later as we will connect to a git repository, the model will be persisted in different model files. Those files can be seen here and you can get inspiration from those class definitions to develop your model.

Defining the business logic
We want to use two sud-decisions and then combined them to build a combined risk. So in the Editor, we select the Assess Risk and add two decisions. We defined the Risk Level to be the output of both decisions, and then link the Loan Application input to those two decisions. The final model looks like:

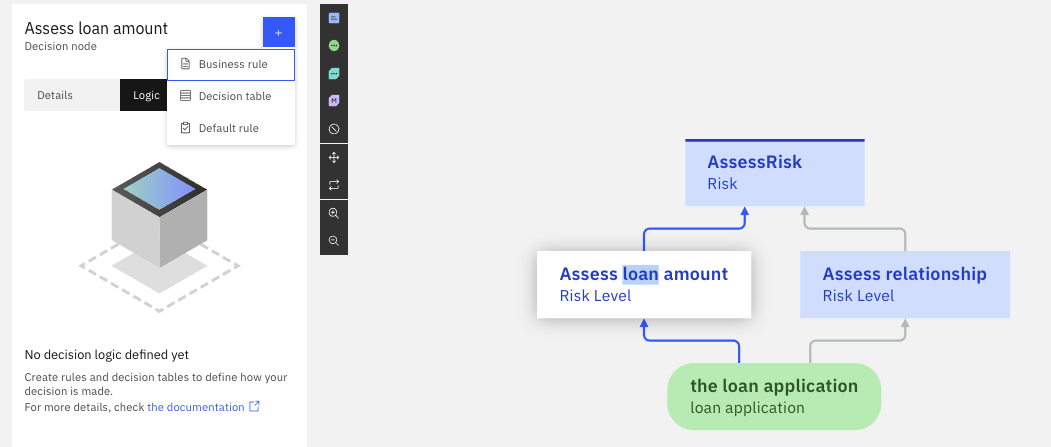
Assess loan amount risk
Select the Assess loan amount node and add a decision table using the logic button:
Assess relationship to the bank risk
To add some of the business rules or tables, we select the decision node and then the logic choice, and then select 'Decision table`:
You select the years with current bank attribute and populate min, max values for three rows.

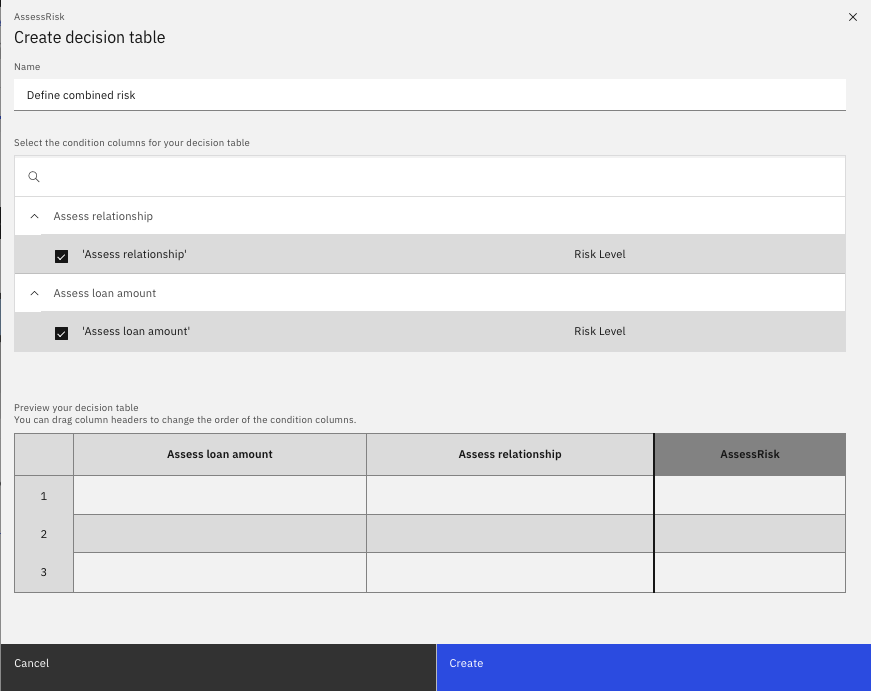
Combine the two risks
To combine the two risk, we build another decision table:
Add a default rule
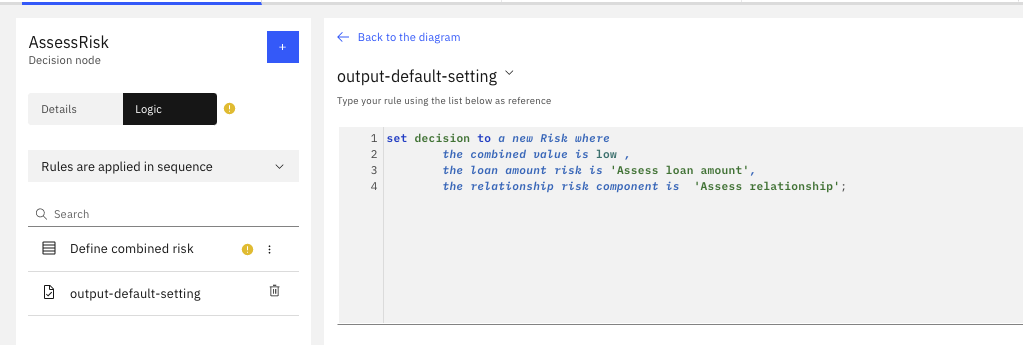
Change the terms so they can be more readable and reflect ubiquitous language
The default rules is showing use that the current 'verbalization' is not perfect, so we need to change some working on the decision names:
- Rename
Assess relationshipdecision node toAssess bank relationship risk decision. - Rename
Assess loan amountnode toAssess loan amount risk decision
Test locally
Using the Run tab we reach a panel where we can enter some test data and then run:
Most likely it will fail. Need to look into the data and the rules. The Run history provides some hints on what went wrong.
In the previous screen, I forgot to add a default rule on the final decision so at least when conditions are not met something is returned.
Normally we need to do more testing, and also extract to json input documents to be able to use them with deployed code.
Deploy
The next step is to deploy to an ADS run time. To deploy a decision service, we must define an operation that is used to call the service.
- Define an operation based on the decision model define

Then use Deploy tab
./images/deploy-ds-0.png)
- define a version number (
v0.0.1), then select the service and the deploy command.
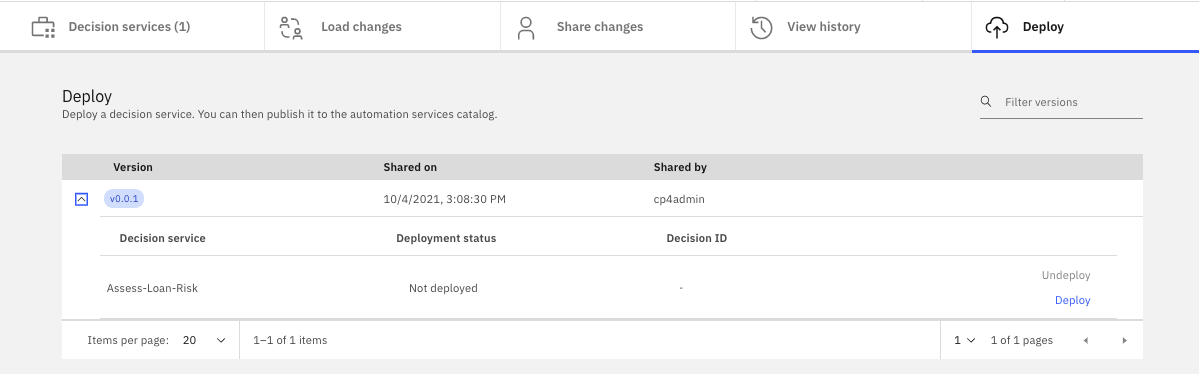
The deployment is using Jenkins pipeline, and will build from the github repository, so ensure to always commit your last changes. Looking at the trace the build process should be successful, it should build a jar file like .m2/repository/decisions/assessloadrisk/assess_loan_risk/assess-Loan-RiskDecisionService/v0.0.1/assess-Loan-RiskDecisionService-v0.0.1.jar
[INFO] Reactor Summary:
[INFO]
[INFO] assess-Loan-Risk v0.0.1 ............................ SUCCESS [  1.930 s]
[INFO] loanModel LATEST-SNAPSHOT .......................... SUCCESS [ 10.267 s]
[INFO] assessLoanRisk LATEST-SNAPSHOT ..................... SUCCESS [ 12.905 s]
[INFO] assess-Loan-RiskDecisionService v0.0.1 ............. SUCCESS [ 37.442 s]
[INFO] ------------------------------------------------------------------------
[INFO] BUILD SUCCESS
Share with Git
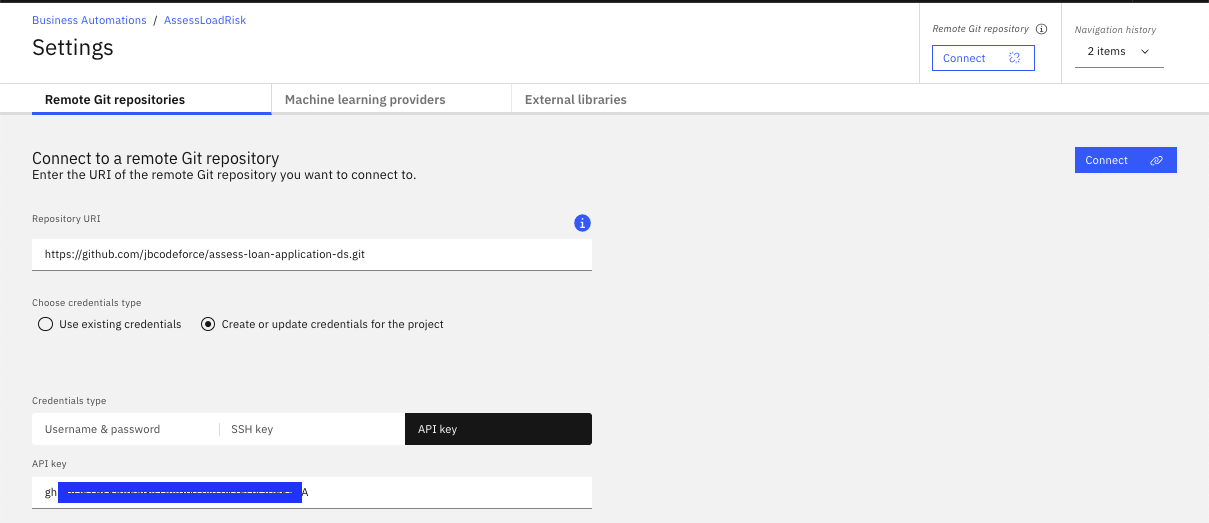
In gitHub, create a public repository, for example assess-loan-application-ds. The suffix -ds for decision service. Be sure to have defined a git access Token on your github account to let the Automation Studio being able to push code to this new repository.
Select the Share change tab
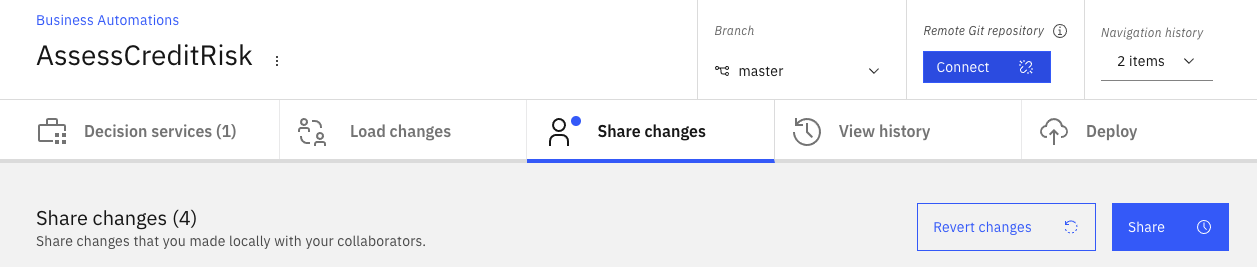
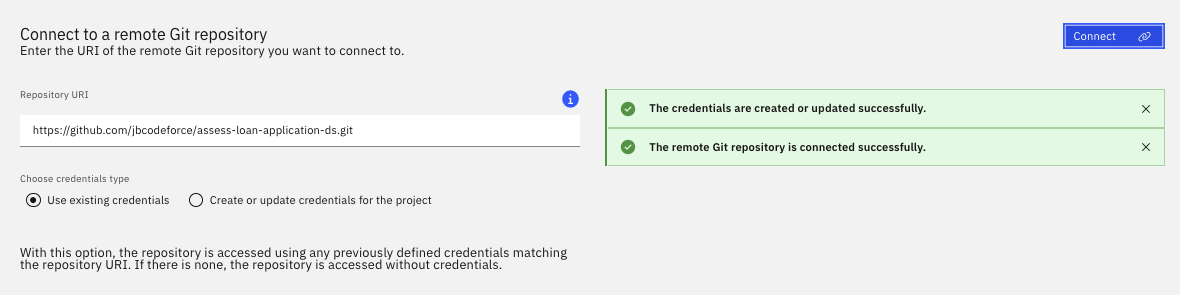
Then select the Repository Connect button to define the git connection parameters (use the access token as API Key):
Once connected you should get the following output:
The next step is to go to the Share changes tab and share the changes proposed, which should update the Git repository content. It is important to have no content in the newly created git repository for the first sharing operation.
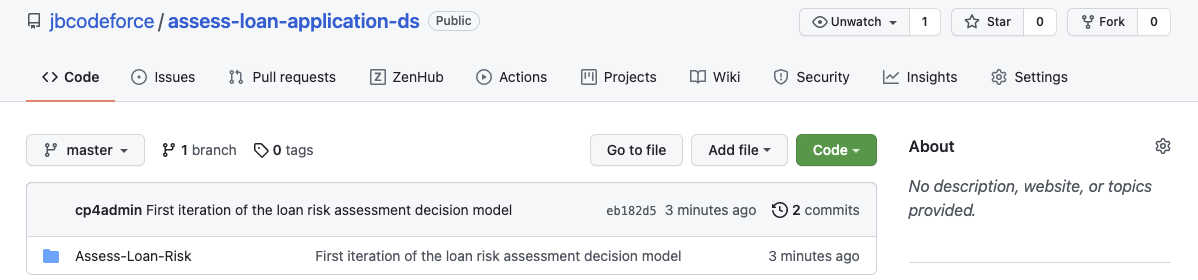
Which includes folder for the data model and the decision model:

Predictive scoring development
This section is inspired by the work done by Pierre Berlandier on the Kaggle Risk Data.